
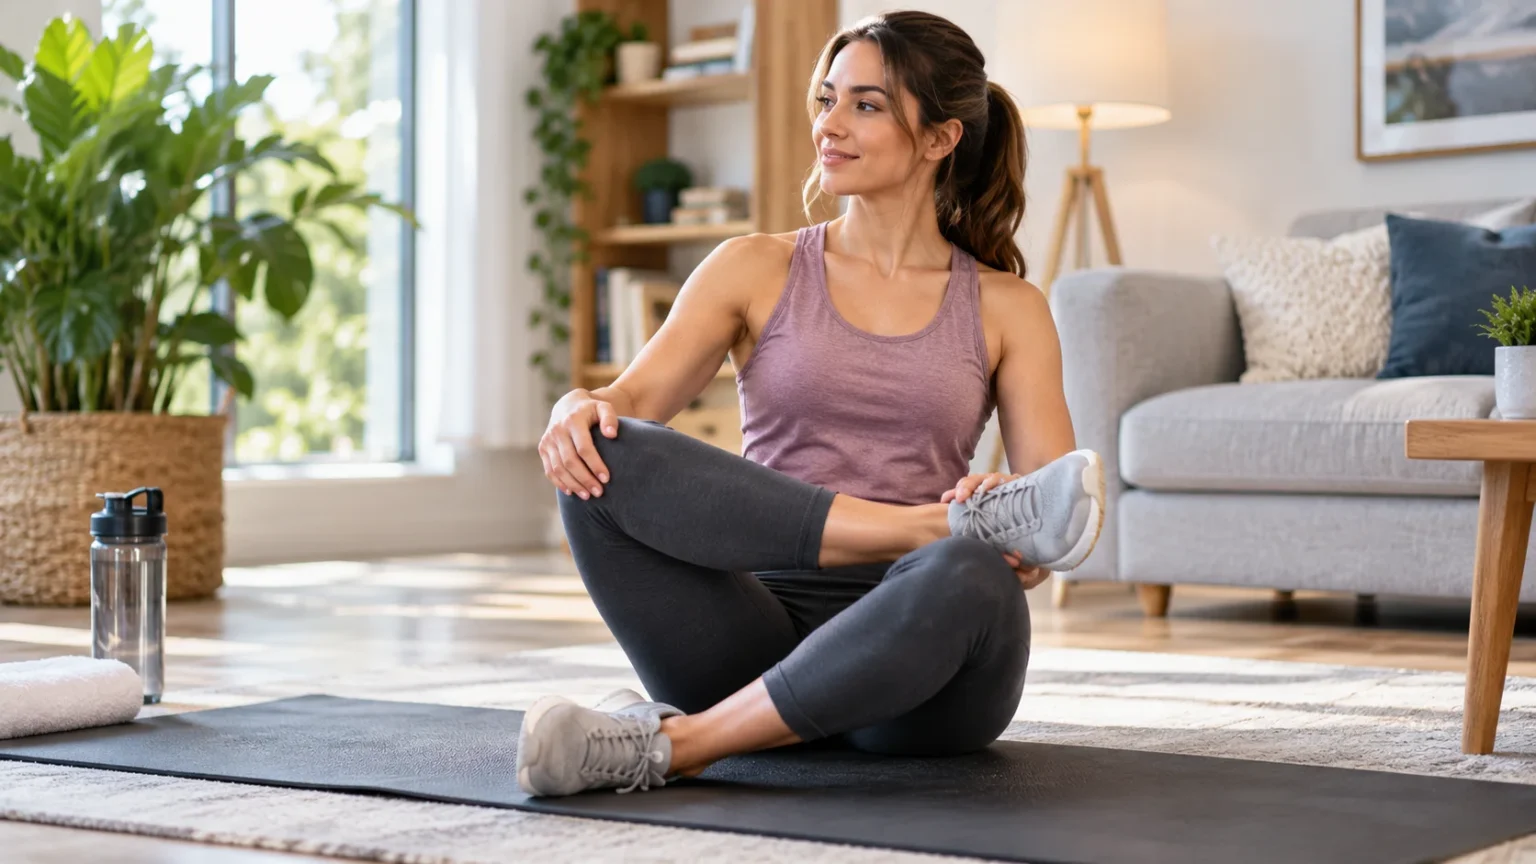

The Figure 4 stretch is a simple mobility exercise commonly used to loosen the hips, glutes, and surrounding muscles. It gets its name from the position of the legs, which resemble the shape of the number four. You can perform it lying down, seated, or standing depending on your mobility and comfort level.
Although the movement looks simple, proper positioning matters if you want to stretch comfortably without placing unnecessary pressure on your knees or lower back. Understanding what the Figure 4 stretch does, which muscles it targets, and how to modify it can help you use the movement more effectively.
What Is the Figure 4 Stretch?
The Figure 4 stretch is a hip-opening movement designed mainly to stretch the gluteal muscles and muscles surrounding the hip joint. You usually perform it by placing one ankle across the opposite thigh, creating a shape that resembles the number four. From there, you gently increase the stretch without forcing the joint.
This position is commonly included in warm-ups, cool-downs, flexibility routines, yoga-inspired mobility sessions, and physical activity programs. People may use it after sitting for long periods or after activities that place repeated demand on the hips. The stretch can be adapted for different mobility levels and body positions.
The Figure 4 is sometimes called a glute stretch or piriformis stretch because of the areas where people commonly feel tension. However, several muscles may contribute to the sensation depending on your anatomy and position. The goal should be gentle, controlled stretching rather than forcing the hip into a deeper range.
Why Is It Called the Figure 4?
The name comes from the visual position created by your legs during the exercise. When one ankle rests across the opposite thigh or knee area, the bent legs form a shape similar to the number four. This recognizable position makes the exercise easy to identify and remember.
Several versions of the movement use the same basic leg position. You can perform a lying Figure 4 stretch on your back, sit in a chair, or use a standing variation while maintaining balance. Although the body position changes, the crossed-leg shape remains the key feature of the exercise.
The term Figure 4 may occasionally be used in other sports or movement contexts, but in fitness and mobility discussions it usually describes this hip stretch. When someone recommends doing a Figure 4 after exercise, they generally mean stretching the glutes and outer hip through this crossed-leg position.
What Muscles Does the Figure 4 Stretch Target?
The Figure 4 stretch mainly targets the muscles around the buttocks and outer hip. The gluteus maximus, gluteus medius, and smaller deep hip rotators may all experience some degree of stretching. The exact sensation depends on your hip position, individual flexibility, and how far you move into the stretch.
The piriformis is another muscle commonly associated with the Figure 4 position. This small muscle sits deep within the buttock region and helps with hip movement and stability. Because it lies underneath larger gluteal muscles, people often describe tightness in this area simply as deep glute or hip tension.
Other nearby tissues can also be affected during the movement. Your lower back, hamstrings, and muscles around the pelvis may respond depending on your posture and flexibility. However, the exercise should primarily create a comfortable stretching sensation around the hip and buttock rather than sharp pressure in the knee or spine.
What Are the Benefits of the Figure 4 Stretch?
One important benefit of the Figure 4 stretch is improved hip flexibility. Regular gentle stretching can help maintain comfortable movement around the hip joint, especially for people who spend many hours sitting. Better mobility may make everyday movements such as bending, walking, getting out of a chair, and exercising feel smoother.
The stretch can also provide temporary relief from feelings of tightness around the glutes and outer hips. People who run, cycle, strength train, or sit at a desk for extended periods may notice stiffness in these areas. A brief Figure 4 stretch can provide a simple way to move and lengthen those muscles.
Another advantage is accessibility because you need little or no equipment. The lying and seated variations can be performed almost anywhere without a complicated setup. This makes the Figure 4 useful for home mobility routines, office stretching sessions, post-workout cooldowns, and short movement breaks during the day.
How to Do a Lying Figure 4 Stretch
Begin by lying comfortably on your back with both knees bent and your feet resting on the floor. Place your right ankle across your left thigh, keeping the ankle slightly away from the knee joint. Your legs should now create the familiar Figure 4 shape while your upper body remains relaxed.
For a deeper stretch, lift your left foot and gently bring the left thigh toward your chest. You can place your hands behind the thigh rather than pulling directly on the knee. Continue until you feel a comfortable stretch through the right glute and outer hip without experiencing sharp or pinching discomfort.
Hold the position while breathing slowly and keeping your shoulders relaxed against the floor. Avoid aggressively pulling the legs toward your chest because greater force does not necessarily create a better stretch. Release slowly, return both feet to the floor, and repeat the movement on the opposite side.
How to Do a Seated Figure 4 Stretch
Sit near the front of a stable chair with both feet placed flat on the floor. Bring one ankle across the opposite thigh while keeping the foot gently flexed. Try to sit upright rather than immediately rounding your shoulders or lower back as you move into the position.
Once you are comfortable, gently hinge forward from your hips while keeping your spine relatively neutral. You may feel the stretch increase through the glute and outer hip of the crossed leg. Move only as far as you can without forcing the knee downward or creating uncomfortable pressure in the hip.
The seated Figure 4 can be especially useful for people who want a simple stretch during the workday. It requires very little space and can usually be performed without getting onto the floor. A stable chair without wheels is preferable because it provides better support and reduces unnecessary movement during the stretch.
Figure 4 Stretch and Hip Mobility
Healthy hip mobility allows the joint to move comfortably through different positions required during everyday activities. Walking, climbing stairs, squatting, getting into a vehicle, and exercising all involve coordinated hip movement. The Figure 4 position focuses particularly on movements involving hip rotation and flexion.
Limited hip movement does not always mean that a particular muscle is permanently tight. Joint structure, activity levels, previous injuries, movement habits, and individual anatomy can all affect flexibility. For this reason, the goal of stretching should be comfortable movement rather than trying to achieve an identical range on both sides.
Including the Figure 4 in a broader mobility routine can be more useful than relying on one stretch alone. Gentle hip rotations, walking, controlled strength exercises, and other mobility movements can complement stretching. Combining mobility and strength can help you maintain comfortable movement during both daily activities and exercise.
Can the Figure 4 Stretch Help With Knee Stiffness?
The Figure 4 is primarily a hip and glute stretch rather than a direct knee stretch. However, hip mobility and lower-body movement are connected, so improving comfortable movement around the hips may influence how your legs move during everyday activities. The exercise should never be used to force a stiff or painful knee into an uncomfortable position.
If bending or crossing the leg creates knee discomfort, choose a gentler variation instead of pushing through pain. Knee stiffness can have many possible causes, so understanding common reasons for a stiff knee can help you decide whether stretching is appropriate. Persistent or worsening symptoms deserve professional evaluation rather than aggressive self-stretching.
You can also adjust where the ankle rests to decrease pressure on the knee. Supporting the crossed leg with a cushion or keeping the legs farther away from your body may make the movement more comfortable. The hip should receive most of the stretching sensation rather than the knee joint itself.
Common Figure 4 Stretch Mistakes
One common mistake is pushing the crossed knee forcefully toward the floor. The purpose is not to make the knee reach a specific position but to create a controlled stretch around the hip. Applying excessive downward pressure can make the movement uncomfortable and may place unnecessary stress on sensitive joints.
Another mistake is holding your breath while trying to stretch farther. Slow, relaxed breathing can help reduce unnecessary muscle tension and encourage you to move gradually. If you find yourself tensing your shoulders, gripping your hands tightly, or holding your breath, reduce the intensity until the position feels manageable.
Poor alignment can also reduce the usefulness of the exercise. During seated versions, excessively rounding the back may shift the movement away from the hip. During lying variations, pulling aggressively with the arms can create strain instead of relaxation, so focus on controlled positioning rather than achieving the deepest possible stretch.
How Long Should You Hold the Figure 4 Stretch?
There is no single perfect duration that works for everyone. Many people hold a comfortable static stretch for roughly 20 to 30 seconds before releasing it gradually. The key is maintaining a gentle stretching sensation without numbness, sharp pain, tingling, or pressure that becomes increasingly uncomfortable.
You can repeat the stretch on each side depending on your routine and how your body feels. Rather than immediately forcing a deeper position, allow yourself time to settle into the movement. Slow breathing and relaxed muscles can often make the stretch feel more comfortable without requiring additional pulling.
Consistency generally matters more than trying to hold one stretch for an extremely long time. A short mobility routine performed regularly may be easier to maintain than an occasional intense session. Your stretching schedule can also depend on your activity level, training goals, physical limitations, and overall mobility program.
When Is the Best Time to Do the Figure 4?
The Figure 4 stretch can be performed at several points throughout the day. Many people use it after workouts when their muscles already feel warm, particularly following lower-body strength training, running, or cycling. It can also work well as part of a gentle evening mobility routine after a day of prolonged sitting.
Before demanding exercise, some people prefer dynamic movements instead of holding long static stretches. Gentle hip rotations, controlled leg movements, and light activity can help prepare the body for exercise. A brief, comfortable Figure 4 may still be appropriate, but it should not leave your muscles feeling strained or excessively relaxed.
You can also use the stretch during movement breaks if you work at a desk. Sitting for several hours can leave the hips and glutes feeling stiff even when nothing is injured. Standing up regularly, walking briefly, and using gentle mobility exercises can provide more movement variety throughout the day.
Who Should Be Careful With the Figure 4 Stretch?
Anyone with recent hip, knee, lower-back, or pelvic injuries should be cautious when trying unfamiliar stretches. The crossed-leg position can place the joints in ranges that may not be appropriate during certain stages of recovery. If a healthcare professional has given you movement restrictions, those recommendations should take priority over a general stretching routine.
People with significant knee discomfort may find the Figure 4 position difficult because the knee remains bent while the hip rotates outward. Instead of pressing through pain, try a smaller range or another hip mobility movement. Stretching should generally create mild muscular tension rather than sharp pain inside or around a joint.
Stop the stretch if you experience sudden pain, numbness, unusual weakness, or tingling that travels down the leg. These sensations are different from normal muscular stretching. Persistent symptoms, unexplained pain, or significant movement limitations should be assessed by an appropriate healthcare professional rather than repeatedly stretched at home.
How to Make the Figure 4 Stretch Easier or Harder
To make the exercise easier, keep the supporting foot on the floor during the lying variation instead of lifting the leg toward your chest. You can also place a cushion under the crossed thigh if the position feels unsupported. These modifications reduce the amount of hip rotation while allowing you to practice the basic shape.
To increase the stretch gently, bring the supporting thigh slightly closer to your torso while maintaining relaxed breathing. During the seated version, hinging forward from the hips can increase the sensation. Always make small adjustments because forcing a large increase in range can quickly turn a comfortable stretch into an irritating one.
Your right and left sides may also feel different, which is common. Do not automatically force the tighter side to match the more flexible side during one session. Work within a comfortable range and allow mobility to develop gradually rather than treating flexibility as a competition or fixed target.
Conclusion
The Figure 4 stretch is a straightforward mobility exercise that mainly targets the glutes, deep hip muscles, and surrounding tissues. Its name comes from the recognizable shape created when one ankle crosses over the opposite thigh. Lying and seated variations make the stretch accessible for many different routines and mobility levels.
Good technique matters more than stretching as deeply as possible. Keep the movement controlled, breathe comfortably, and aim for gentle tension around the hip rather than pain in the knee or lower back. Small modifications can make the exercise more comfortable when flexibility is limited.
The Figure 4 can be a useful part of a balanced routine that includes regular movement, mobility work, and appropriate strengthening exercises. It should support comfortable movement rather than become something you force your body to perform. Consistent, gentle practice is usually more practical than aggressive stretching.
FAQs
What does Figure 4 mean in exercise?
Figure 4 usually refers to a hip stretch where one ankle crosses over the opposite thigh. The position of the legs resembles the shape of the number four.
What does the Figure 4 stretch target?
The Figure 4 mainly stretches the glutes and deep muscles around the hip. Many people also feel the movement around the outer hip and piriformis region.
Is the Figure 4 stretch good for tight hips?
It can help create a gentle stretching sensation around tight-feeling hips and glutes. Results depend on the cause of the stiffness, mobility level, and how consistently you move.
Should the Figure 4 stretch hurt?
No. You should generally feel gentle muscular tension rather than sharp, burning, or intense joint pain. Reduce the range or stop if the position causes significant discomfort.
Can I do the Figure 4 stretch every day?
A gentle Figure 4 stretch can fit into many regular mobility routines. Keep the intensity comfortable and adjust the frequency if your hips or knees feel irritated afterward.